Staking requirements
An important step is for operators to register their node so that it is effectively recognised as part of the pNetwork. There are two possible ways to do that:
- Stake at least 200,000 PNT
- Stake at least 10 Yolo Parrots NFTs + an optional amount of PNTs
The second option is only available on BSC. Each Yolo Parrots NFT accounts for 400 PNTs.
DO NOT transfer PNTs or Yolo Parrots NFTs straight from an exchange (e.g. Binance, ...) to the node manager contract. Please withdraw them to a personal address of yours first.
pNetwork Nodes
What is a pNetwork Node
The pNetwork is an open, public and independent network with an inbuilt governance structure.
pNetwork Node Operators are the entities running the cross-chain infrastructure (hardware and software) that secures every pTokens bridge running on the pNetwork. Nodes operate the crucial cross-chain infrastructure to ensure that smart contracts and dApp users across every blockchain have access to assets' value and liquidity.
These cross-chain node operators are responsible for watching the blockchain for new incoming requests for asset switches from one network to another and ensuring the requested asset tokenisation process happens correctly.
What is the PCLI
pNetwork Node Command Line Interface (PCLI) is the tool needed to deploy and fully maintain your pNetwork Node, you can run it on your MacOS, Linux and Win10 with WSL.
Incentives for pNetwork Nodes
Running a pNetwork Node enables anyone to join a fast-growing ecosystem and earn rewards while contributing to building a more decentralized world.
pNetwork Nodes are a critical component for the security of the pNetwork. For this reason, the protocol aims to reward their operation by redistributing the fees generated by the system to its contributors.
Indeed, nodes will benefit from protocol fees, specifically 0.1% pegin fees and 0.25% pegout (redeem) fees.
Since the approval of PIP-26 (PGP-1), a $10 minimum protocol fee has been applied to both pegins and pegouts in all bridges.
Fees will be automatically distributed to Node Operators as they are paid by users, in the pToken currencies processed by bridges. For example, node operators contributing to a BTC asset switch would be rewarded in pBTC. Similarly, when contributing to a PNT cross-chain transactions, Operators are rewarded in PNT.
Anyone can set up a pNetwork Node and secure the cross-chain movement of assets.
Prerequisites for running a node
- Stake at least 200,000 PNT or 10 Yolo Parrots NFTs in the pNetwork DAO | Staking PNT
- Setup a server running pNetwork Node on a Trusted Execution Environment (TEE) | Setup Node Server (Nitro)
Node server (Nitro)
AWS Nitro Enclaves
This specific pNetwork Node type, called "Nitro", is based on the "AWS Nitro enclaves" TEE type.
More on the AWS Nitro Enclaves' tech: https://aws.amazon.com/ec2/nitro/nitro-enclaves/
All configurations in your AWS account will be done automatically by the pNetwork Node Command Line Interface, you won't need specific skills to set up your AWS account.In the next steps, we will prepare an AWS user with special permissions so that pNetwork Node CLI can use it to configure the node.
Costs
The server instance will cost approx 160 $/month. However, it depends on which region you choose to set up the node. You can do some simulations using the following information.
Actually, the services needed are:
- Amazon EC2
- OS Linux
- Model c5a.xlarge
- Disk 64 GB (gp2)
- AWS Key Management Service
With this information, you can do a simulation of the costs by changing the regions at this link: https://calculator.aws/#/addService
Steps required to set a pNetwork node
Step 1: Create an AWS Account
Reference: https://aws.amazon.com/premiumsupport/knowledge-center/create-and-activate-aws-account/
To start, you need to create an account on AWS. If for any reason you don't want to use AWS just hold on until we release more TEE types in the coming months.If you already have an AWS account, go directly to step 2.
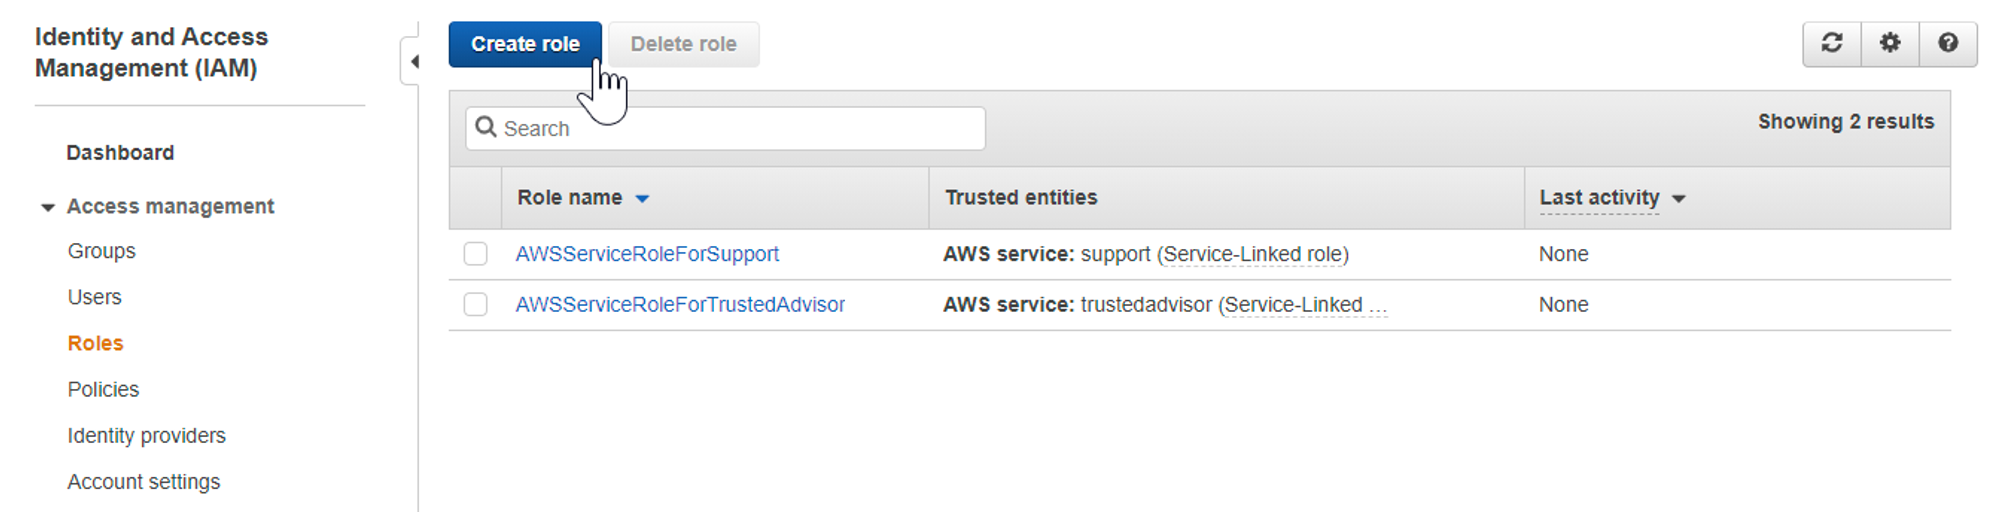
Step 2: Create pnodeRole Role
1. From the IAM Dashboard click on Roles
2. Click then on Create role
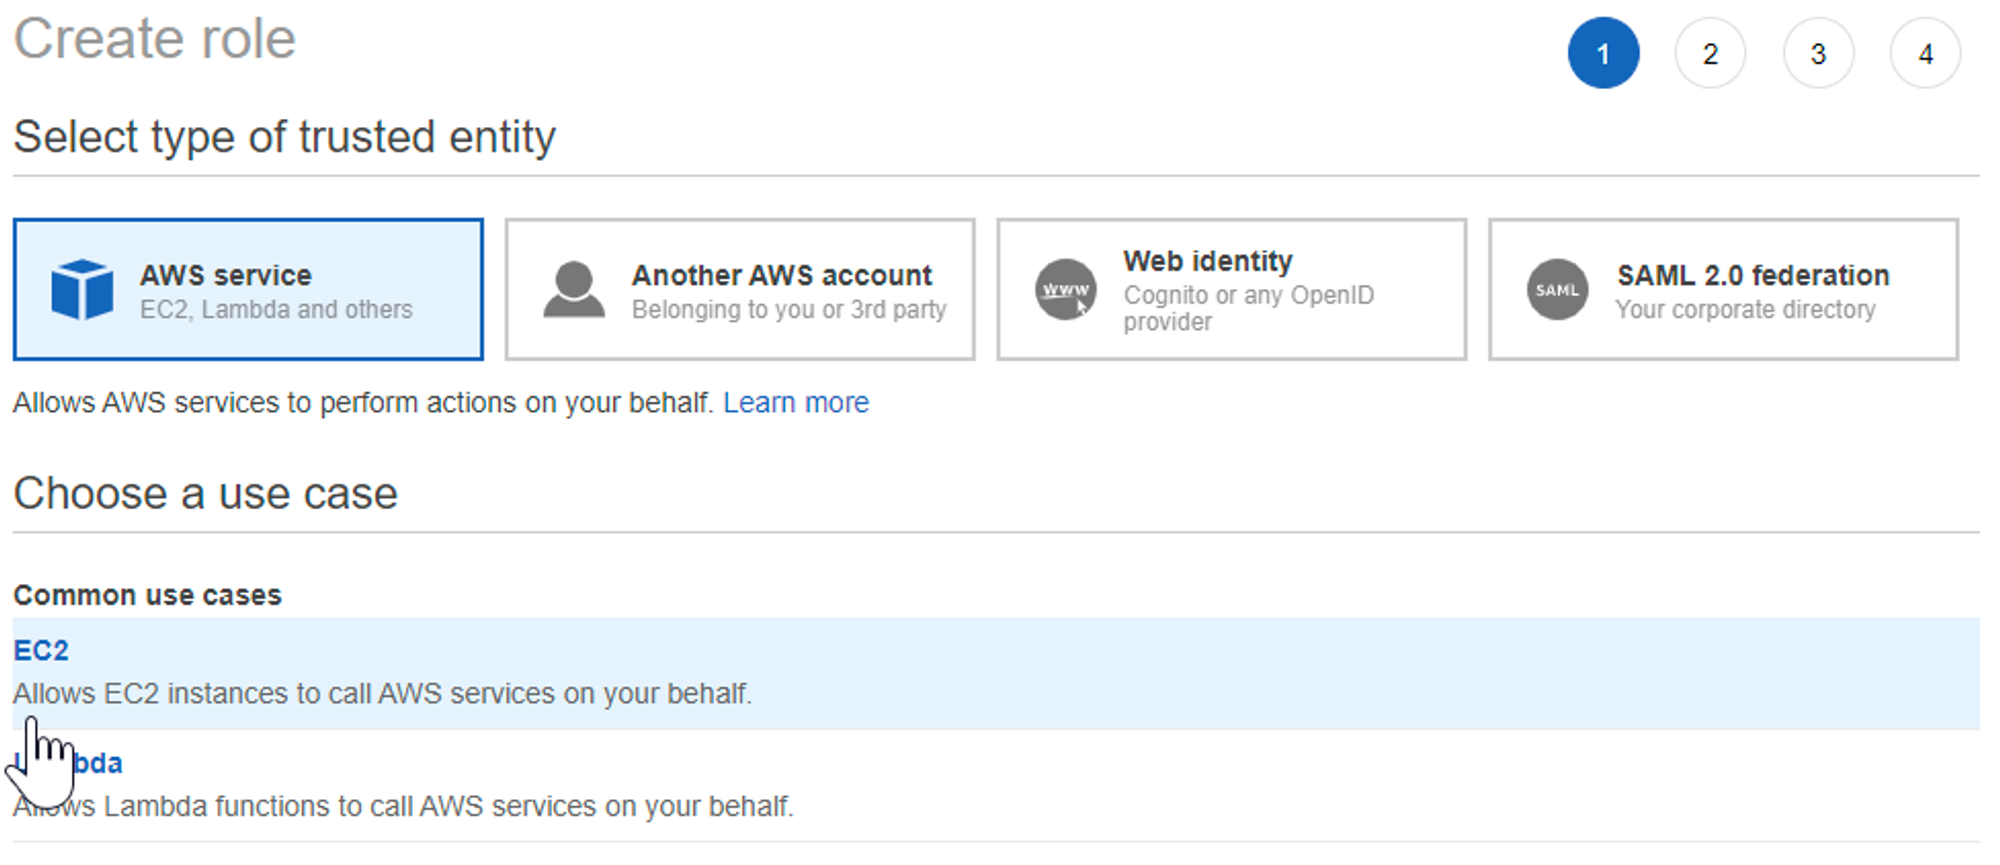
3. Select AWS service and EC2. Then continue with Next: Permissions
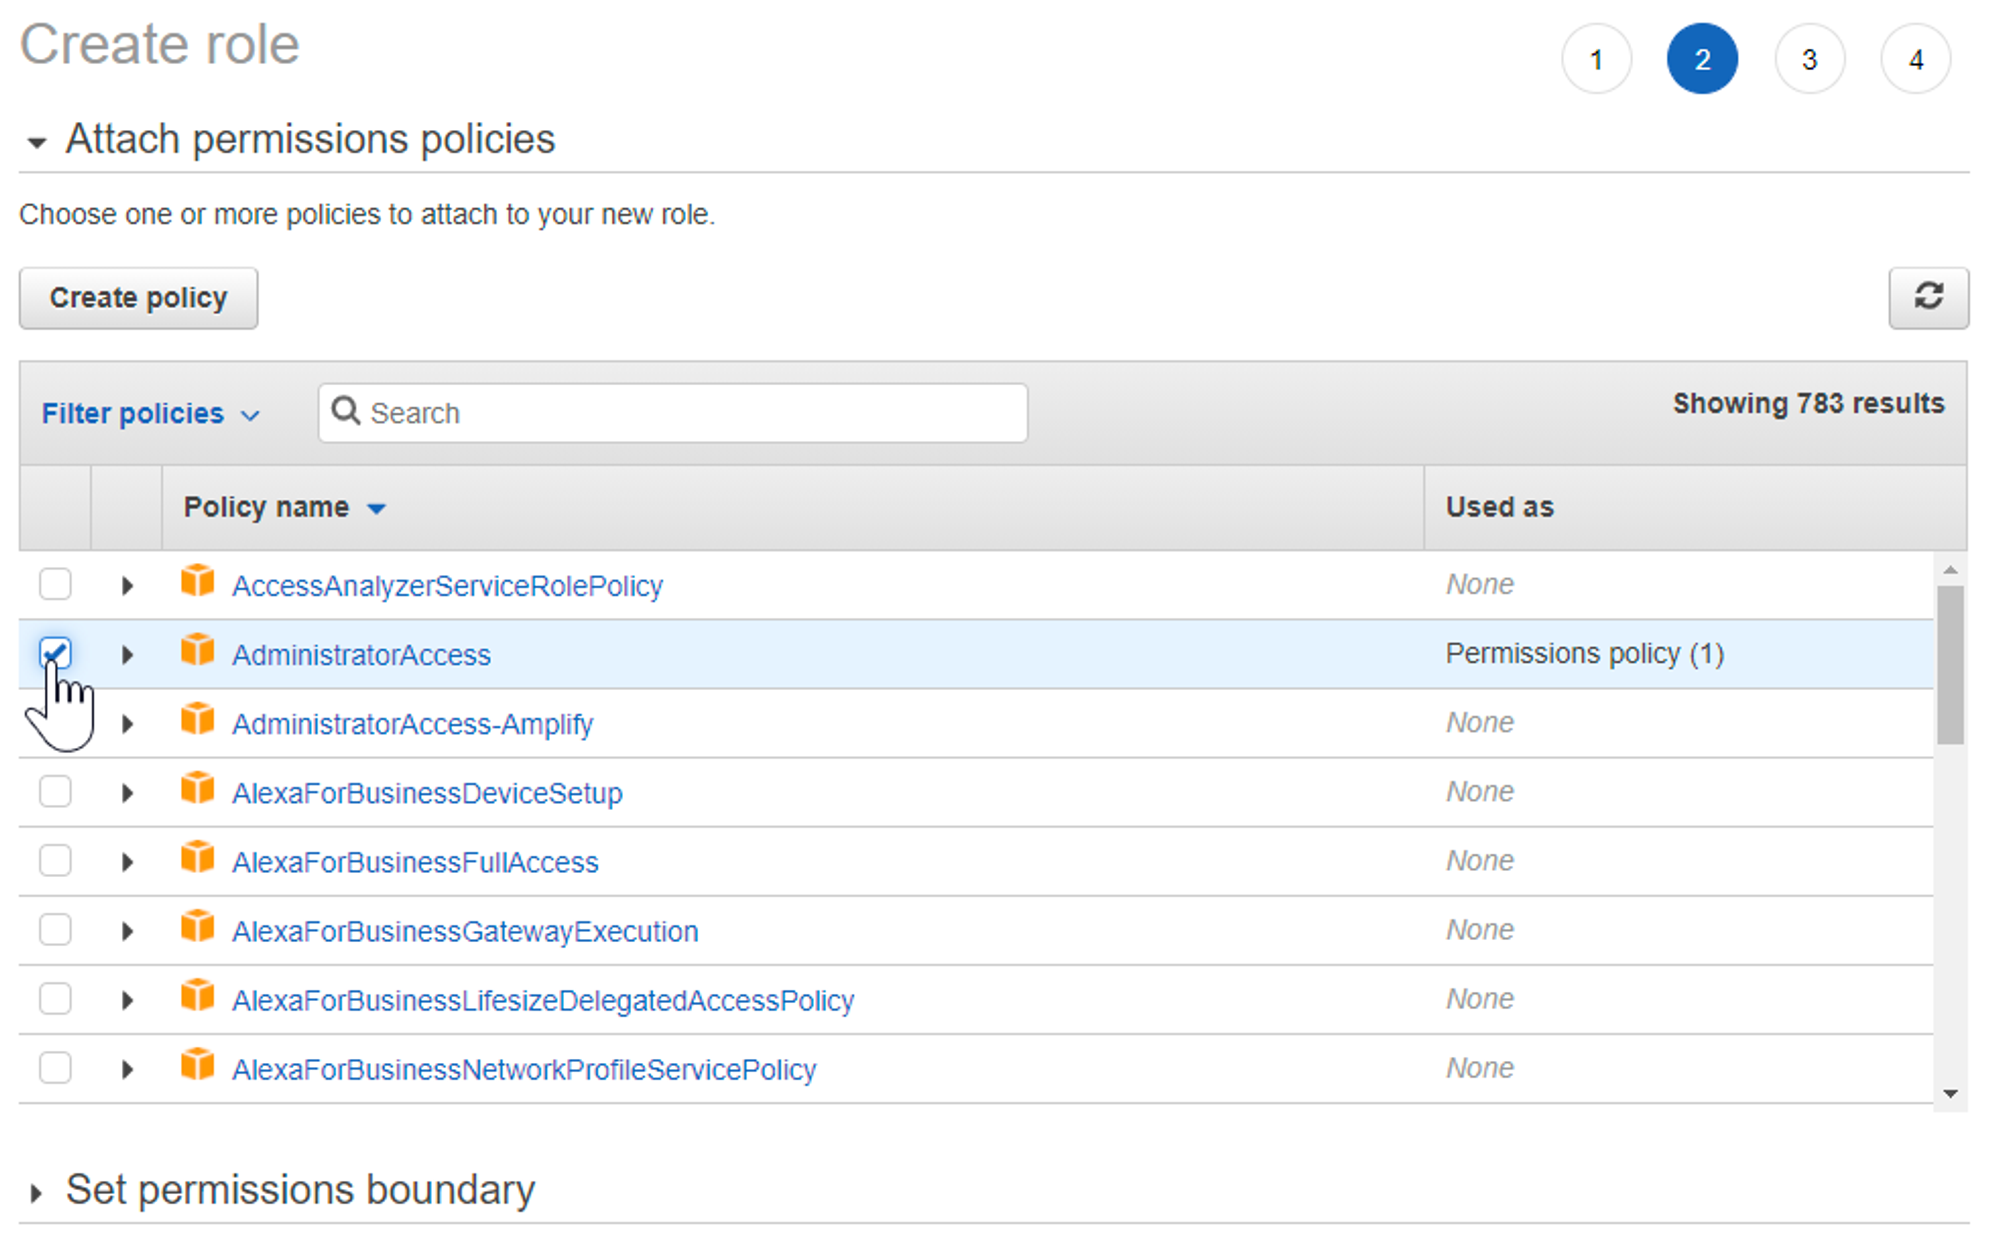
4. Check AdministratorAccess and click on Next: Tags
5. Continue with Next: Preview
6. Name the role pnodeRole and confirm with Create role
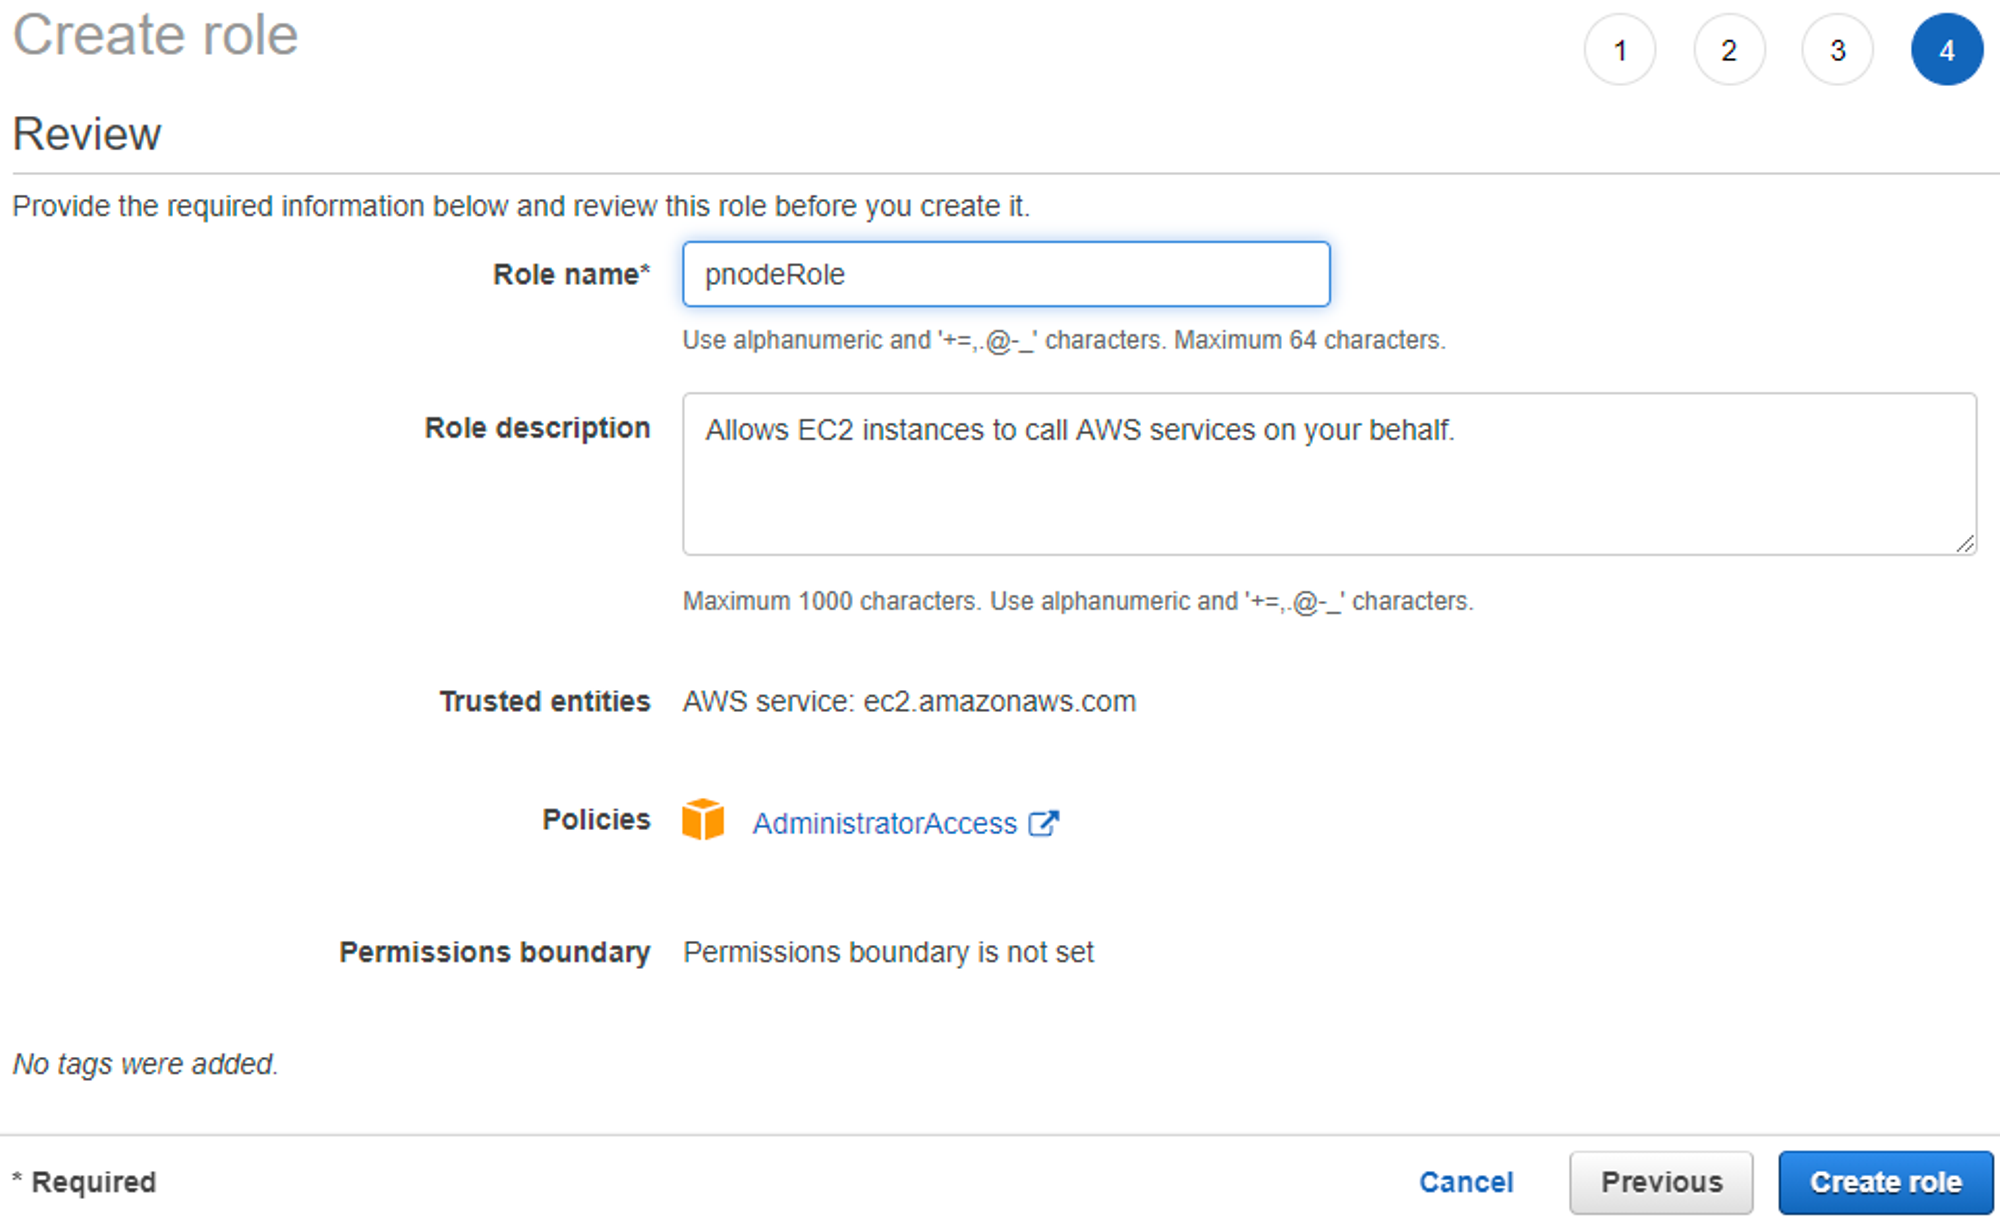
7. The role pnodeRole has been created
Step 3: Create a User for the pNetwork Node Creation Access
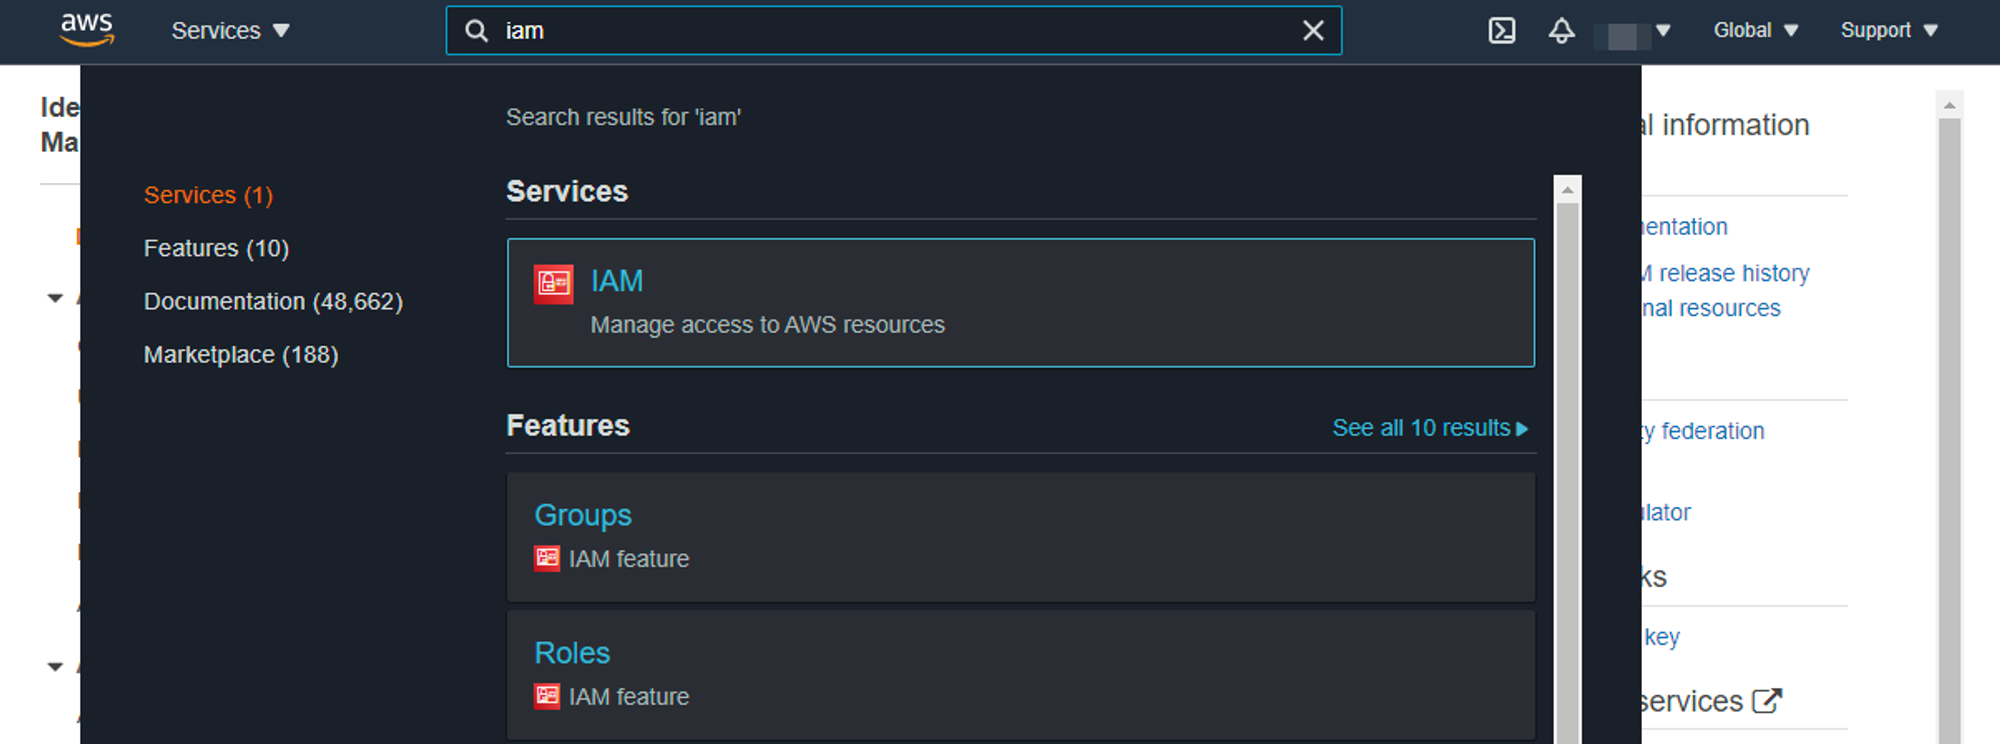
- Search for IAM in the search bar and click on the IAM option
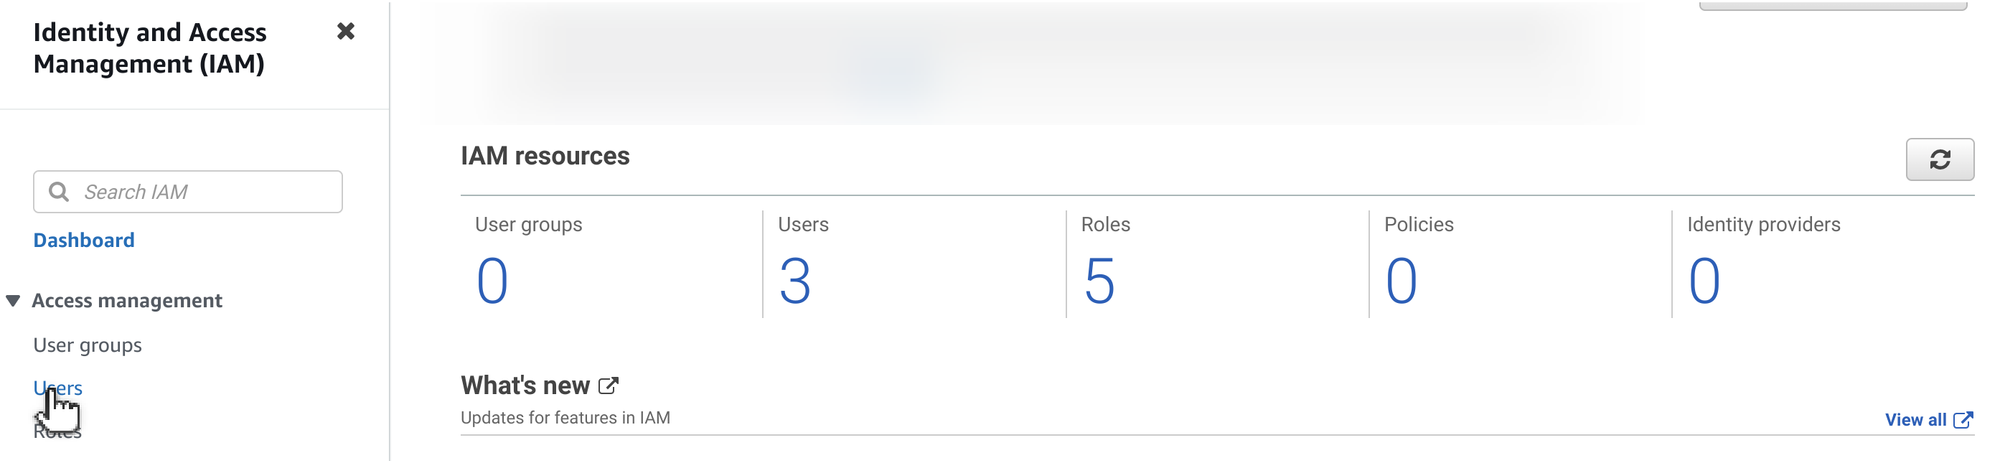
- On the left side menu, click on Users
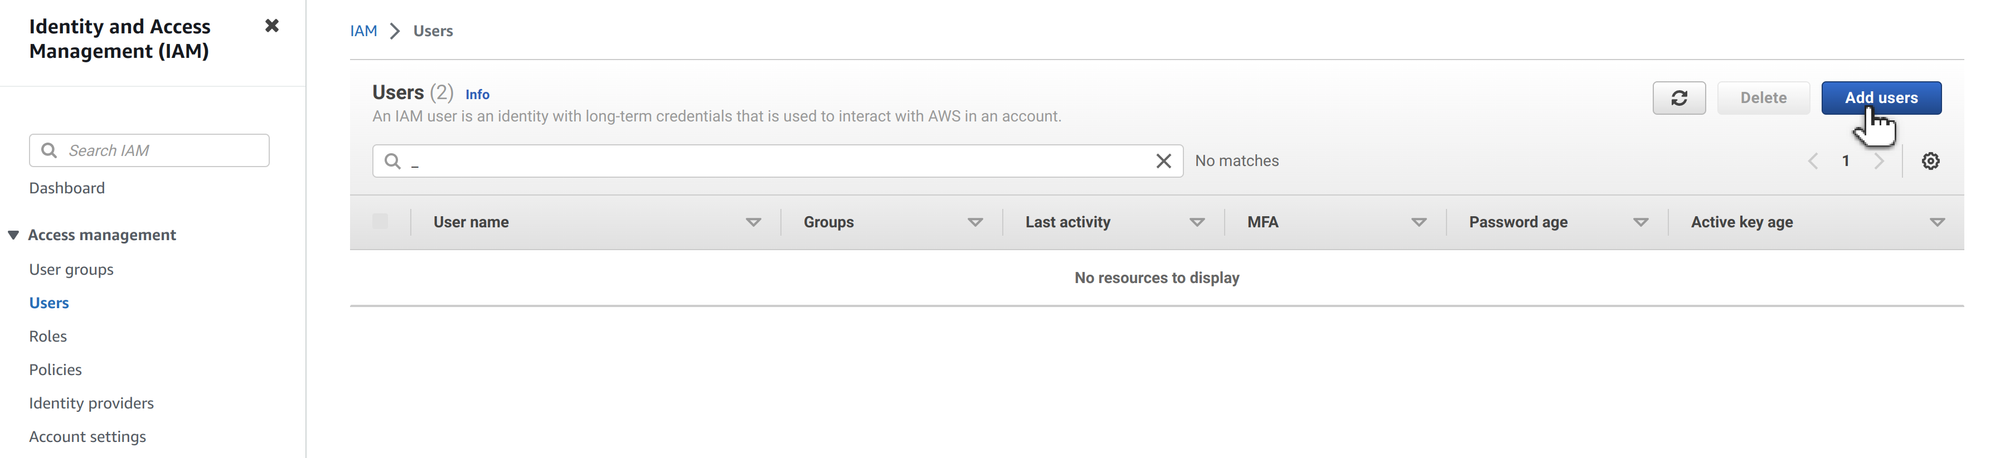
- Than click Add user
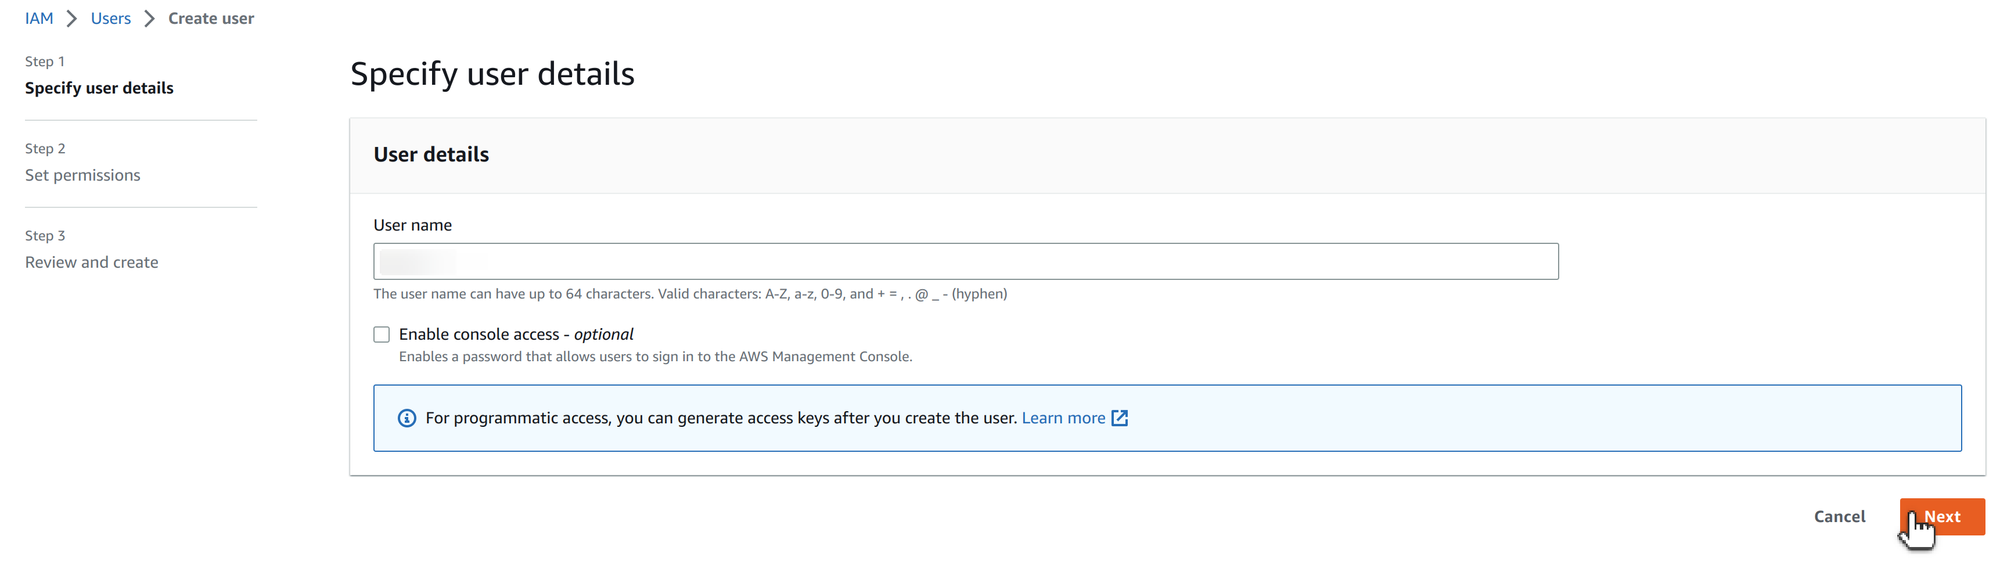
- Name the user as you like. Then continue with Next
- Click on Attach existing policies directly

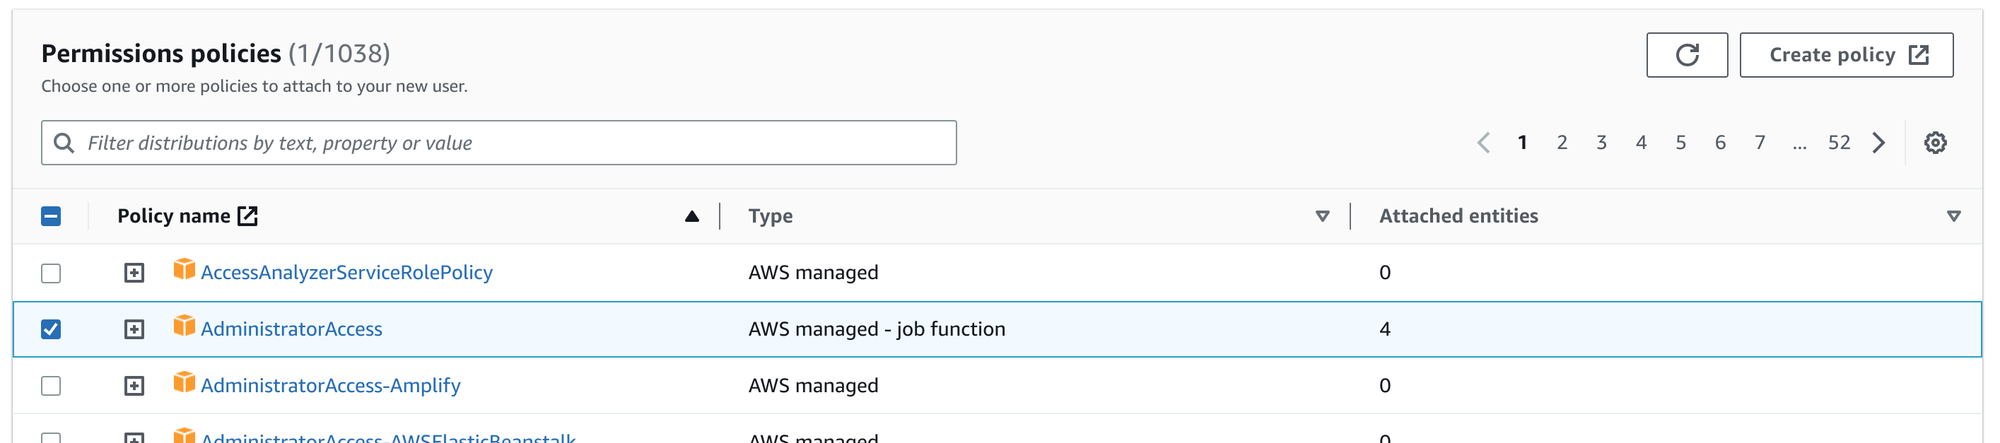
- Check on AdministratorAccess policy and click on Next
- Complete user creation with Create

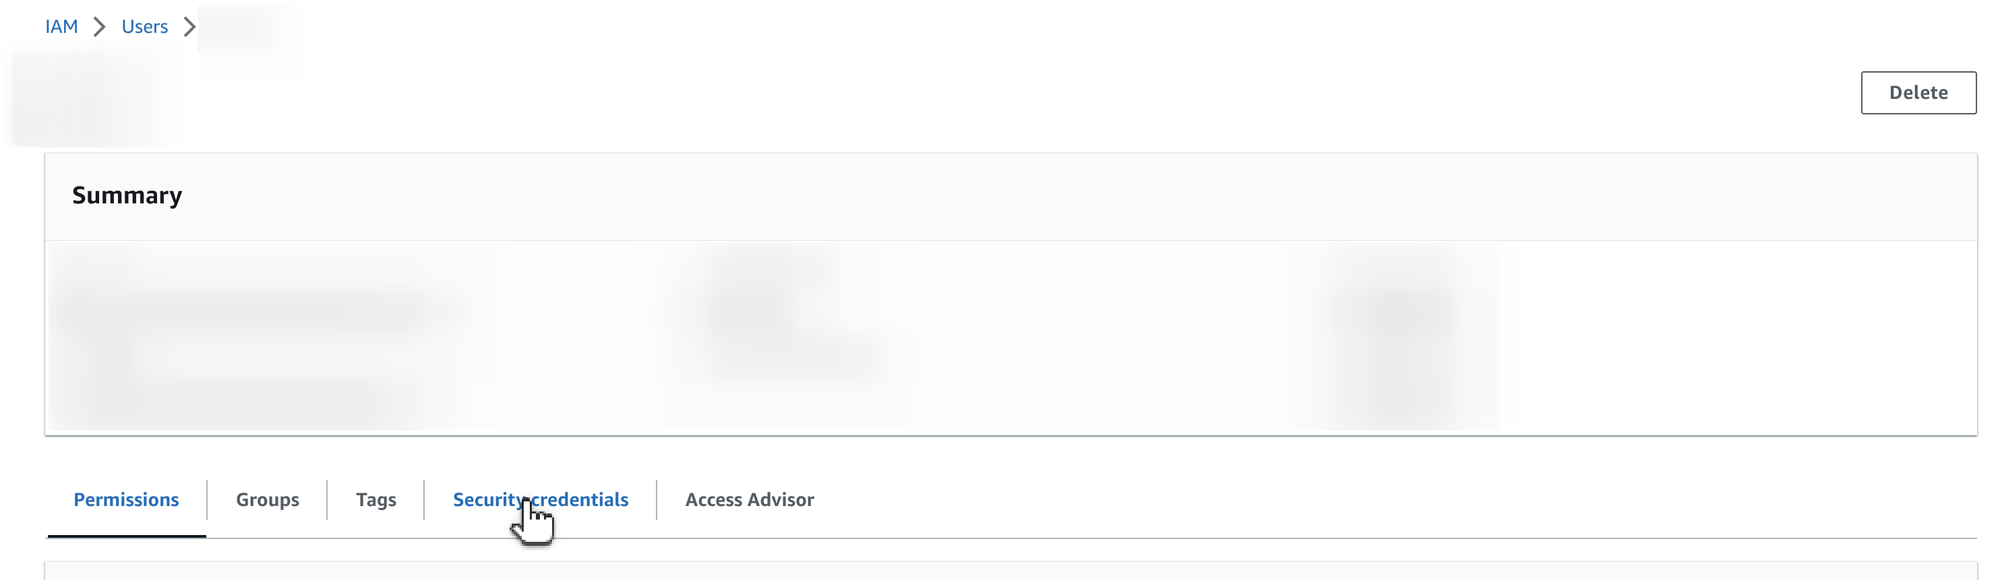
- Once created you will see the users list, click on the user just created to configure it
- Select the tab Security credential
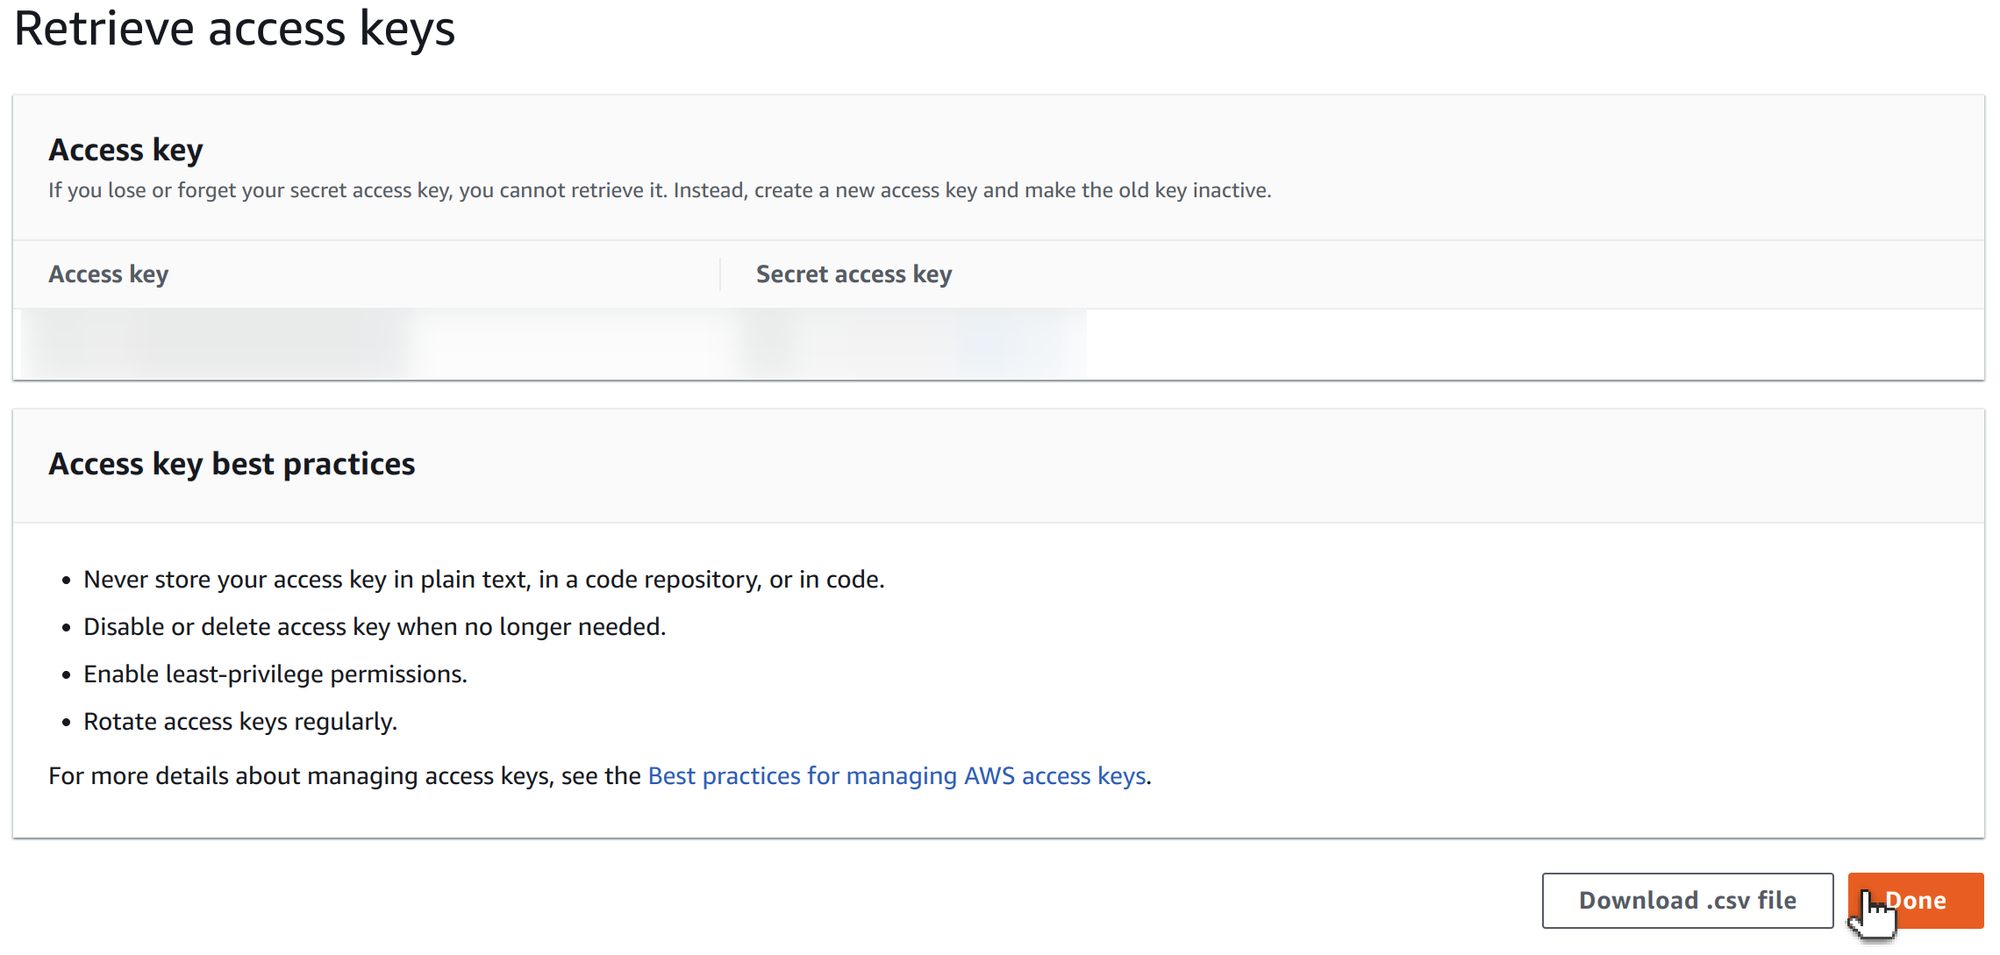
- Search for Access keys and click Create access key

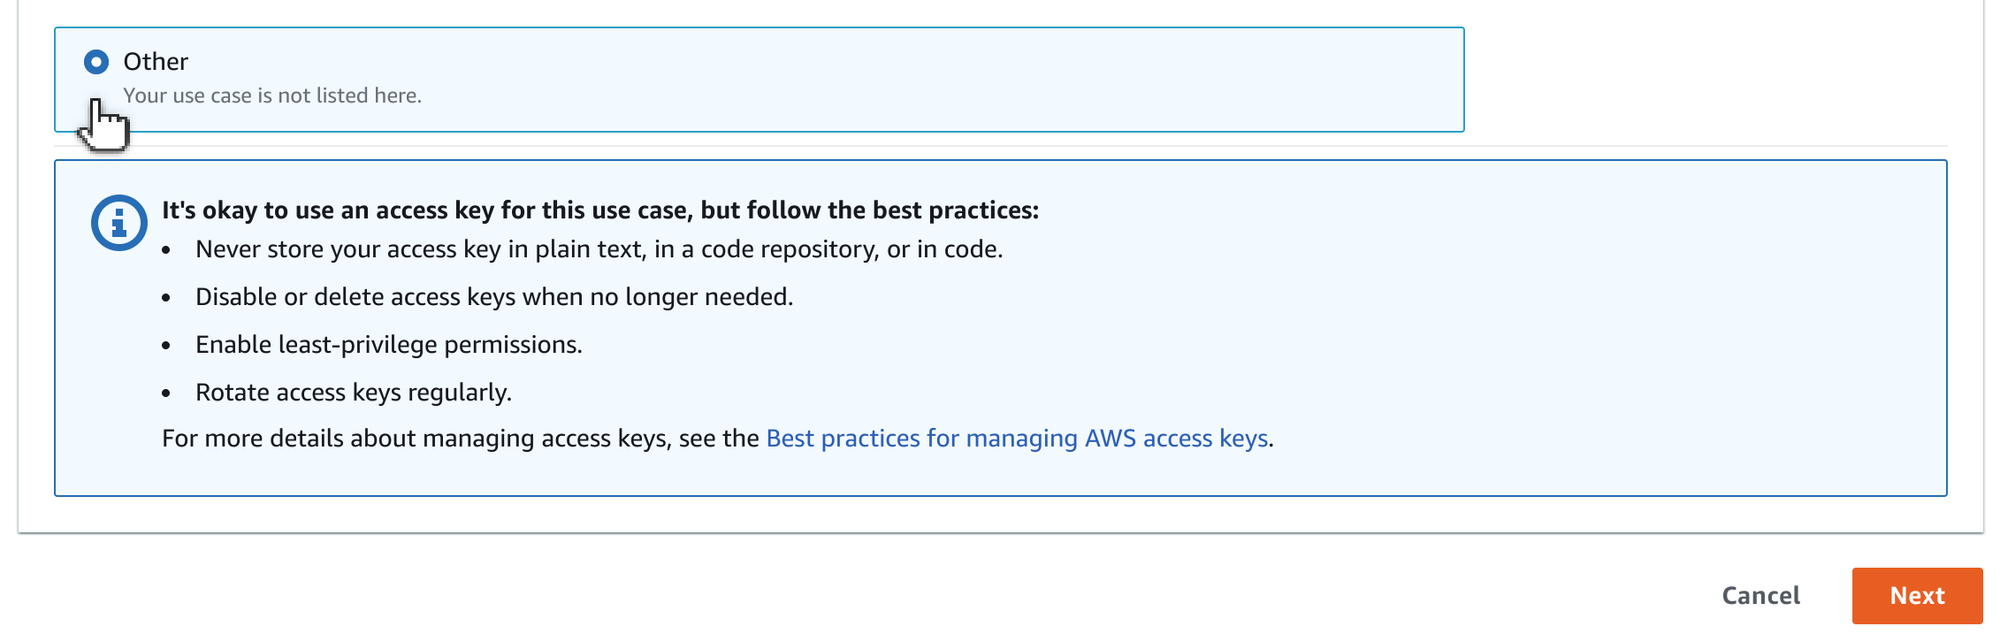
- Select Other and go on with Next
- Click on Create access key
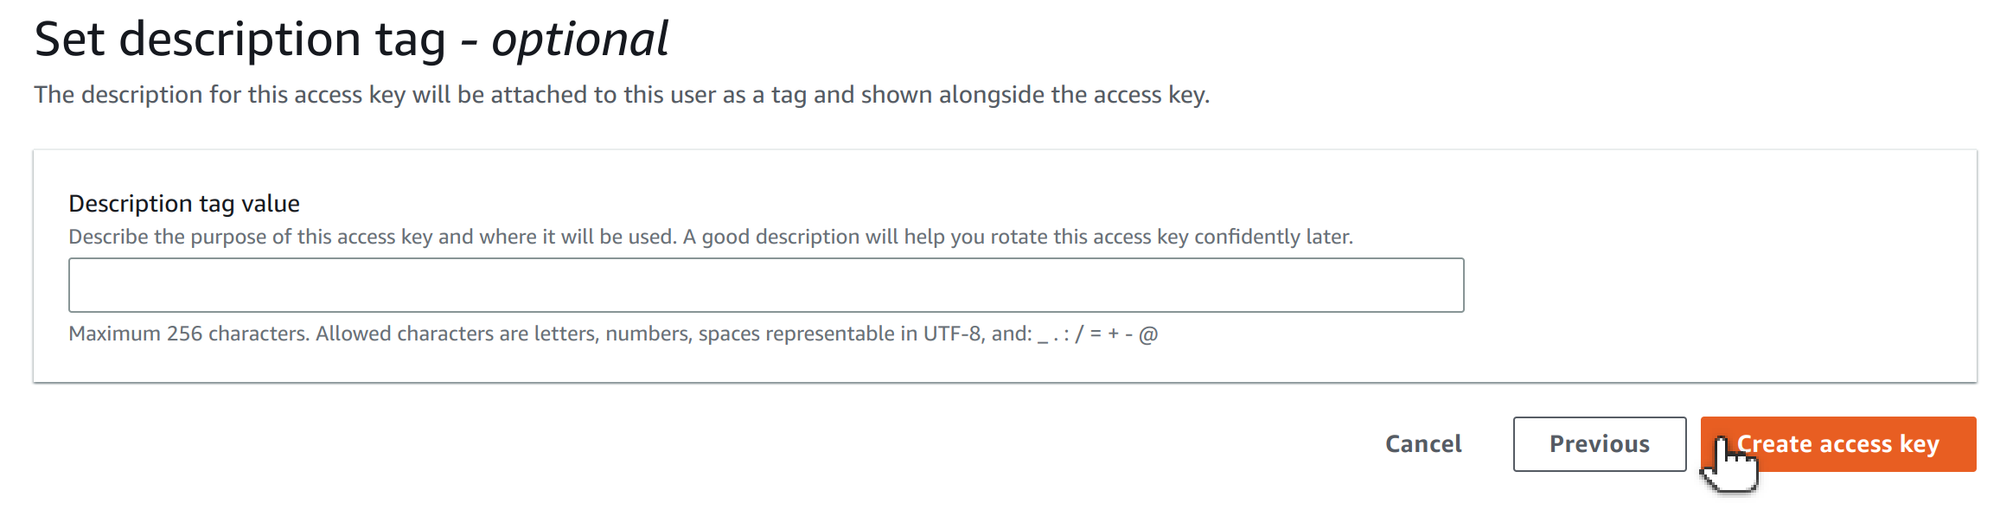
- On the last page you can download the CSV file containing your Access key ID and your Secret access key, by clicking on Download .csv file. Then click Done
Store them safe, anyone with these keys will have access to your node.
- The user has been created, now you can proceed with the installation of pNetwork Node Command Line Interface: